Document management
Even with more and more (electronic) paper coming in, I was initially skeptical whether I need a document management: I actually was happy with sorting pdfs into a folder structure. I had to try paperless-ngx to understand how much faster (especially searching and checking documents) and easier it is.
I especially like that:
- The documents are stored in the file system - and are also available if paperless-ngx is not running or in case it should be discontinued.
- It "learns" which correspondent, document type and tags to assign to new documents.
Installation
PostgreSQL
I strongly recommend using PostgreSQL as a database. With SQLite the performance starts to degrade when a few hundred documents have been added.
- Install a Container engine
- Create the folder
paperless-ngxwith the subfolders:consume(documents placed in this folder will be consumed by paperless-ngx)data(logs and the classification model)export(exports and database backups)media: (documents)
- Download these files into the folder
paperless-ngx- Alternatively you can download the files from the original source
- Change the configuration in
docker-compose.env:- Remove the leading
#in front ofPAPERLESS_SECRET_KEYand replacechange-mewith a series of random characters (you don't have to remember them) - If you are running paperless-ngx on Windows (WSL2) the automatic detection of new files in the
consumefolder might not work. Configure a regular polling (e.g. every 60 seconds) by adding the following line todocker-compose.env:PAPERLESS_CONSUMER_POLLING=60.
- Remove the leading
- Run the following command in the folder
paperless-ngx:podman compose pullpodman compose up -d
- Open http://localhost:8000
Configuration and usage
I recommend the following OCR Settings:
- Output Type:
pdfa - Language:
deu+eng - Deskew: Experiment with this setting - for some documents it improves the quality, other are skewed a bit more.
To get started, copy a document into the folder consume. It will be added to the document management and you can edit the metadata in the browser.
You can find further advice in this this article 🇩🇪 .
Features
Configure advanced features to make document handling and usage even simpler.
Document splitting
If your scanner has an automatic document feeder (ADF) to scan multiple pages at once, you can scan multiple pages and let paperless-ngx "split" them into separate documents.
You need a barcode that represents a certain text (by default: PATCHT) that will signal paperless-ngx where a new document starts. The most robust solution is to use the following QR-Code:
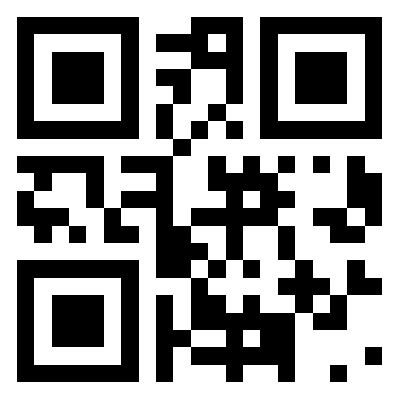
Shrink QR-code before printing
The QR code has a large resolution, but that doesn't mean you need to print it that large. Depending on the resolution of your scanner, 25% of the size should be fine.
Print-out the code - I recommend double-sided, so you can scan double-sided documents.
Add the following entries to docker-compose.env:
PAPERLESS_CONSUMER_ENABLE_BARCODES=true
PAPERLESS_CONSUMER_BARCODE_SCANNER=ZXING
When you scan documents, put the QR-code page(s) where you want to split the documents.
Double-sided documents
If your scanner has an automatic document feeder (ADF) but does not support duplex-scanning, you can scan multiple documents on both sides and let paperless-ngx handle the merging.
Create the folder double-sided in your folder consume and add the following entries to docker-compose.env:
PAPERLESS_CONSUMER_ENABLE_COLLATE_DOUBLE_SIDED=true
PAPERLESS_CONSUMER_RECURSIVE=true
The process is the following:
1. Scan one side of the documents into the folder double-sided (hint: Scan it into a different folder and check it, before moving it)
2. Wait for paperless-ngx to consume the document (once it disappears from the folder)
3. Turn the documents around (don't change the order) and scan them in to the folder double-sided
4. Once paperless consumes the second scan, the new document will appear.
Split double-sided documents
You can combine the functionality with document splitting.
You can find more information on paperless-ngx.com.
Auto-login
If you want to avoid typing user name and password every time you open paperless-ngx, you can configure automatic login.
paperless-ngx server
Do not use this setting when running paperless-ngx on a server.
Add the following entry to docker-compose.env:
PAPERLESS_AUTO_LOGIN_USERNAME=<your username>
Other
- This article describes how to automatically remove passwords while consuming new documents
Maintenance
Administrative tasks and advanced access.
Backup and restore
Include the entire paperless-ngx folder in your backup strategy. The documents (subfolder: media) and the classification model (subfolder: data) are automatically included. The database however is stored on a volume and needs to be extracted (before the backup).
Database backup (Document exporter)
The easiest way to backup the database, is to use the document exporter. The following command creates the backup pgbackup.zip in the folder export:
podman compose exec -T webserver document_exporter ../export --data-only -z -zn pgbackup
pgbackup.zip into the folder export and run:
podman compose exec -T webserver document_importer ../export --data-only
Database backup (Volume)
Another way is to backup the entire volume containing the database. Assuming the volume is named paperless_pgdata and you want to backup into the subfolder backup, you run:
podman run --rm -v "paperless_pgdata:/data" -v "%~dp0/backup:/backup-dir" ubuntu tar cvzf /backup-dir/pgdata.tar.gz /data
Database (DB) upgrade
New versions of PostgreSQL are not compatible with old data files. Therefore you need to backup, delete and restore the data when upgrading to a new version.
Simultaneous upgrade of paperless-ngx
Do not upgrade paperless-ngx and the DB in the same step! A new version of paperless might change the DB structure - which could prevent restoring your data. It is recommended to update paperless-ngx before changing the docker-compose.yml file.
- Update paperless-ngx (run
podman compose pullandpodman compose up -d) - Backup the database as described in Database backup (Document exporter))
- Stop and remove the containers:
podman compose down - Delete the volume containing the database (usually paperless_pgdata) in Podman
- Update the
docker-compose.ymlfile (version number afterdocker.io/library/postgres) - Update the image:
podman compose pull - Start paperless-ngx:
podman compose up -d - Restore the database as described in Database backup (Document exporter))
Direct database access
If you used the docker-compose.yml file from my repository, it includes pgadmin. This makes it possible to directly access the paperless-ngx database:
- Open http://localhost:8888
- Enter username
admin@example.comand passwordadmin - Register the server (if not done yet):
- Right click on Servers: Register ➡️ Server...
- Enter a name of your choice and the following properties
- Name:
paperless-ngx - Host name/address:
db - Port:
5432 - Maintenance database:
paperless - Username:
paperless - Password:
paperless
- Name:
- Open the Server
paperless-ngx